
Views: 0 Author: Site Editor Publish Time: 2026-07-27 Origin: Site


Venturing into towering dunes or navigating dense OHV trail systems demands more than just horsepower and courage. You need absolute visibility to stay safe among other aggressive drivers. Off-Road Whip Flags act as essential safety beacons. They ensure strict compliance in OHV parks while broadcasting your location over steep crests. Improper installation frequently leads to snapped fiberglass poles. It also causes electrical shorts in LED variants or completely lost equipment due to severe trail vibration. When components fail miles from civilization, you instantly lose your primary safety measure.
To prevent this, we provide a rigorous, vehicle-agnostic installation framework. This guide covers both standard sand flags and illuminated whip lights. You will learn exactly how to evaluate mounting placements. We will show you how to select the right hardware and route electrical wiring safely. By following these steps, you can minimize failure risks under the harshest off-road conditions.
Selecting the correct mounting point represents the foundation of a reliable setup. Different vehicles present unique structural challenges. You must match your bracket style to your vehicle's specific geometry to guarantee long-term stability.
Once you select a mounting location, you must choose a base style. We highly recommend evaluating how often you transport your vehicle. Your storage environment also plays a major role in this decision.
| Base Style | Feature-to-Outcome | Implementation Risk |
|---|---|---|
| Fixed Bolt Base | Offers a lower profile and lower initial cost. It securely fastens the pole directly to the bracket. | Requires manual unbolting for removal. It poses a high risk of striking garage doors if forgotten. |
| Quick-Release Base | Allows rapid removal before entering garages, enclosed trailers, or low-clearance trails. | Quick-release ball bearings can seize. Sand and mud will jam them if not regularly cleaned and lubricated. |
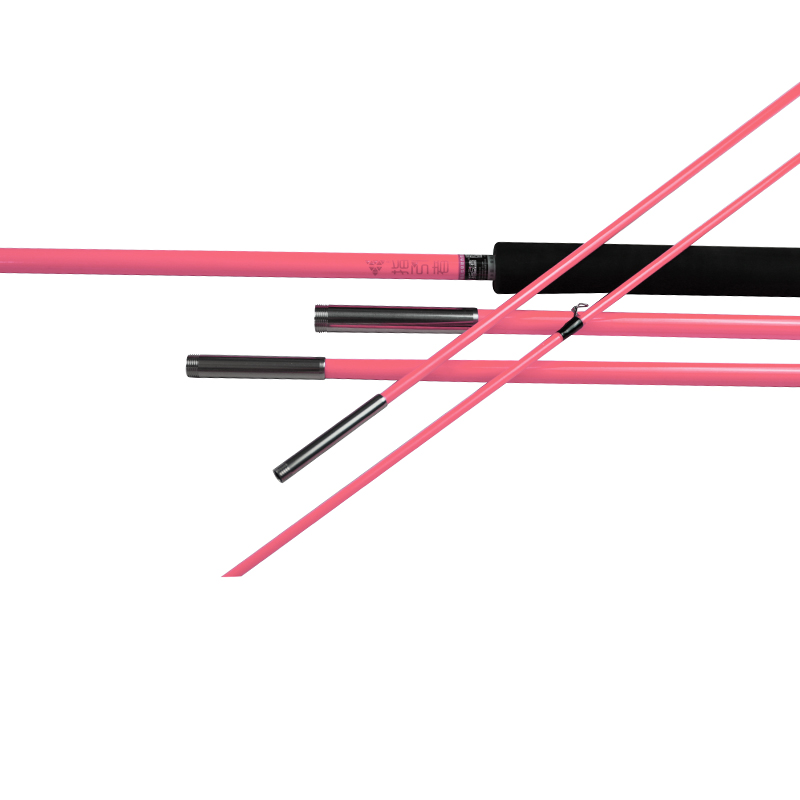
Preparation prevents mid-installation frustration. Gathering the correct tools ensures you assemble the components securely. Trail vibrations will disassemble any loosely fitted hardware. You must treat this installation as a permanent structural modification.
You need a comprehensive set of mechanical tools to secure the brackets. Gather a standard socket set and crescent wrenches. Bring Allen keys specifically sized for your chosen bracket. A calibrated torque wrench is essential. Aluminum brackets crack easily under excessive force. The torque wrench prevents you from crushing expensive hardware.
Illuminated Off-Road Whip Flags require precise electrical integration. You need quality wire strippers and a ratcheting crimping tool. Do not rely on cheap pliers to crimp connections. Gather marine-grade heat shrink tubing to seal out moisture. Buy plenty of automotive zip ties. A digital multimeter is critical for verifying voltage drops and confirming a solid ground connection.
Raw hardware will not survive off-road environments alone. You must apply medium-strength threadlocker (e.g., Blue Loctite) to every mounting bolt. This fluid cures in the threads and resists harmonic vibrations. Purchase dielectric grease for all electrical plug connections. It repels water and prevents terminal corrosion. Finally, use an anti-seize compound for any aluminum-to-steel thread pairings to prevent galling.
This guide assumes you have already selected a bracket compatible with your specific vehicle's geometry. We also assume you have verified the structural integrity of the mounting point. Never mount a heavy fiberglass pole to thin plastic body panels or weak fiberglass roofs.
Standard sand flags do not require wiring. However, they endure immense physical stress. A heavy flag acting as a sail generates significant leverage against the base. Follow these sequential steps to ensure maximum durability.
Position the bracket carefully on your roll cage or bed rail. Ensure the flag will stand perfectly vertical. A leaning flag looks unprofessional and alters the stress distribution on the mount. Apply medium-strength threadlocker to all mounting bolts. Tighten them evenly in a cross pattern. Finally, torque the bolts to the manufacturer's exact specification. Avoid over-tightening aluminum brackets. Excessive force causes micro-fractures, which eventually lead to catastrophic bracket failure on the trail.
Thread the whip flag base directly into the secured bracket. We highly recommend using a heavy-duty spring base for aggressive dune usage. The spring absorbs violent impacts and intense wind resistance. It prevents the rigid fiberglass pole from snapping at the mounting threads. When installing the spring base, ensure it seats completely flush against the mounting bracket. Use an oversized wrench to lock it firmly into place.
Insert the fiberglass whip into the mounting base. For fixed bases, tighten the locking bolt securely against the pole. If you use collet-style or pin-style quick releases, push the pole down firmly. You must audibly confirm the lock engages. Listen for the distinct "click" of the ball bearings snapping into the machined groove. Pull upward on the pole violently to verify it will not fly out at high speeds.
You must perform a dynamic clearance test before driving. Manually pull and flex the flag to simulate heavy trail whip. Push it forward, backward, and side to side. Verify it does not strike the vehicle body. Check clearance against your roof rack. Ensure it cannot smash into the rear windshield at maximum deflection. If the pole hits any vehicle components, reposition the bracket immediately to prevent costly damage.
Illuminated Off-Road Whip Flags transform your vehicle into a highly visible beacon at night. However, poor wiring creates severe fire hazards. Off-road vehicles endure water crossings, thick mud, and abrasive sand. Your electrical routing must withstand these exact elements.
Determine a safe and reliable power source first. Do not wire the lights directly to the battery without a dedicated switch. Direct wiring drains the battery silently. Route your power cables to a fused aftermarket switch panel, such as an sPOD or Switch-Pros system. Alternatively, install a dedicated dash rocker switch. Map out the entire wiring path before cutting any cables.
Run your wires along the vehicle's existing factory harness paths whenever possible. Factory engineers already identified the safest routing zones. Keep your cables strictly away from hot exhaust components. Avoid routing near moving suspension pivot points. Protect the wires from sharp metal edges passing through the firewall. Secure the wiring every 6 to 8 inches using UV-resistant zip ties. Leave a small drip loop near the base to prevent water from running down the wire into the plug.
Strip the wire ends cleanly. Use a ratcheting crimp tool to attach heat-shrink butt connectors. Standard plastic connectors allow moisture ingress, which rots copper wire rapidly. After crimping, use a heat gun to shrink the tubing until adhesive oozes out the sides. Apply a generous coating of dielectric grease to the quick-disconnect plug located at the base of the whip flag. This grease blocks sand and water from ruining the delicate connection pins.
Electrical safety requires proper fusing. Install an inline fuse as close to the power source as possible. Typically, a 5A or 10A fuse suffices, depending on your specific LED amperage draw. If a wire chafes and shorts out, the fuse blows instantly, preventing an electrical fire. Ground the negative wire properly. Run it to a clean, bare-metal chassis point. Scrape away any paint or powder coating at the ground location to guarantee a zero-resistance connection.
Installation does not end when you tighten the last bolt. You must verify legal compliance and establish a maintenance routine. Off-road environments destroy neglected equipment quickly.
Measure the highest point of the installed flag from the ground up. Dune regulations across various OHV parks generally mandate an 8-foot minimum height. Popular spots like Glamis or Silver Lake enforce these rules strictly. Park rangers will deny you entry if your setup falls short. Additionally, confirm you have the correct high-visibility pennant. Many parks require a specific rectangular or triangular orange flag attached near the top.
Your hardware will settle during its first exposure to trail vibrations. Schedule a mandatory shakedown check after 50 miles of off-road use. Grab your torque wrench and re-torque all mounting bracket bolts. Check the spring base for any looseness. Inspect your electrical zip ties to ensure they have not snapped or shifted. Catching a loose bracket early prevents complete equipment loss.
Establish a routine inspection schedule for your Off-Road Whip Flags. Periodically inspect the fiberglass poles for micro-cracks or splintering. UV exposure degrades fiberglass over time, making it brittle. Flush your quick-release mechanisms frequently. Use a dry PTFE spray lubricant. Avoid wet silicone or grease lubes on the exterior mount. Wet lubricants attract abrasive sand, which permanently destroys the ball bearings.
Successful installation relies entirely on precise execution. You must select the appropriate bracket for your specific vehicle type. Properly managing severe trail vibration through threadlockers and spring bases keeps your equipment secured. For illuminated models, routing electrical components safely prevents catastrophic shorts and battery drain. Overlooking any of these phases compromises your visibility and safety.
Before planning your next desert trip, double-check your local OHV park's exact regulations. Measure your overall height to confirm compliance. Finalize your purchase of any complementary hardware, like heavy-duty spring bases or inline fuses, today. Completing these final action steps ensures your vehicle remains highly visible, fully compliant, and trail-ready.
A: Yes, especially for stiff fiberglass poles or heavy LED whips. A spring base absorbs heavy impacts and intense wind resistance. This flexibility prevents the rigid base from snapping off completely at the mounting threads during high-speed driving.
A: You must use specialized brackets for trucks. Purchase bed-rail brackets, stake pocket mounts, or tailgate hinge brackets. Manufacturers design these specifically for truck models to provide secure mounting points without requiring a tubular roll cage.
A: Yes, provided the combined amperage draw does not exceed the switch's maximum rating or the inline fuse capacity. You should wire both LED flags in parallel to ensure they receive consistent voltage from the power source.
A: Dirt, fine dust, and sand frequently jam the internal ball bearings. Clean the mechanism thoroughly using high-pressure compressed air. Afterward, apply a dry silicone or PTFE spray lubricant. Avoid wet lubricants, as they attract and trap abrasive sand.


