
Views: 0 Author: Site Editor Publish Time: 2026-08-07 Origin: Site


Off-roading demands constant situational awareness. You push vehicles across unpredictable dunes, deep mud bogs, and dense forests. High visibility keeps you safe in these harsh environments. Selecting the wrong size whip flag isn't just an aesthetic mistake; it can lead to immediate equipment failure on wooded trails or denial of entry at regulated OHV parks. Park rangers routinely turn away riders carrying undersized gear. Off-roaders must balance maximum visibility for safety with the physical constraints of their primary riding terrain and vehicle dimensions. You cannot use a one-size-fits-all approach. This guide breaks down exact sizing frameworks, terrain-specific requirements, and hardware evaluation criteria to help you finalize your purchase of off-road whip flags. We cover everything from legal heights to specific mounting setups. You will discover practical advice to secure the exact equipment you need for your next adventure.
State parks and dune recreation areas strictly enforce equipment rules. Popular destinations like Glamis in California or Silver Lake in Michigan require specific visibility standards. Rangers measure compliance using total height from the ground. They do not simply measure the raw length of the pole. Most regulated sand dunes mandate a total setup height between 8 and 10 feet. You must understand this distinction clearly. Buying a 4-foot pole for a low-slung bumper might leave you short of legal compliance. Always verify local regulations before planning a trip. They update guidelines frequently based on recent accident statistics. Proper research prevents you from facing immediate rejection at the entry gate.
Sand dunes create unique physical hazards. Blind crests represent the most dangerous elements in open desert riding. Two vehicles often approach the same steep ridge simultaneously. They cannot see each other through the thick sand embankments. Your safety equipment solves this exact line-of-sight problem. The pennant must pierce the skyline long before your vehicle roofline breaches the peak. A tall, brightly colored marker gives oncoming drivers a crucial split-second warning. They can alter their trajectory or hit the brakes. Short markers fail entirely in this environment. If your setup remains hidden behind the dune crest, it provides zero protective value during high-speed ascents.
Trail riding introduces a completely different set of physical challenges. You trade open skies for dense canopies and tight corridors. Running a rigid 6-foot pole on a forested trail creates a massive liability. Low-hanging branches strike tall equipment relentlessly. These impacts generate immense leverage against your mounting brackets. The rod will eventually snap under repeated stress. Worse, rigid materials can shatter violently and send debris toward the cabin. You must prioritize clearance and snag prevention in these environments. Shorter equipment survives tight trails much better. Adapting your setup to the local canopy height prevents frustrating mid-ride repairs.
Calculating your required equipment size requires basic math. You determine your true setup height using a simple formula: Total Height = Vehicle Ground Clearance + Mounting Point Height + Whip Length. You must measure from the dirt to the top of the pennant. Many beginners make the mistake of measuring only the rod itself. They ignore suspension lifts and oversized tires. These modifications change your baseline significantly. Grab a tape measure and evaluate your rig on flat ground. This precise approach guarantees you purchase the correct Off-Road Whip Flags for your specific build.
| Vehicle Type | Typical Mount Point | Est. Mount Height (from ground) | Recommended Whip Length | Estimated Total Height |
|---|---|---|---|---|
| UTV / Side-by-Side | Rear Roof Cage | 6 Feet | 3 to 4 Feet | 9 to 10 Feet |
| UTV / Side-by-Side | Rear Bumper / Bed | 3 Feet | 5 to 6 Feet | 8 to 9 Feet |
| Jeep / Truck | Rear Tailgate | 3.5 Feet | 6 Feet | 9.5 Feet |
| ATV / Quad | Rear Cargo Rack | 3 Feet | 5 Feet | 8 Feet |
Modern UTVs feature tall factory roll cages. Your mounting location dictates your shopping strategy. A typical roof mount requires much shorter rods. A 3-foot or 4-foot pole easily achieves the required 9-foot total elevation. However, many riders prefer rear bed or lower cage mounts. These lower points require much longer rods. You will need 5-foot or 6-foot options to clear the roofline safely. If the pennant sits below the roofline, it becomes invisible from the front. The vehicle cabin entirely blocks the visual signal. Always ensure the marker extends well above the highest point of the vehicle chassis.
Full-size vehicles present unique mounting challenges. Owners rarely mount tall poles directly to the roof. You would strike every highway overpass and drive-thru ceiling. Instead, bumper and tailgate mounts dominate the truck market. Because these mounting points sit low to the ground, they require significant length compensation. You generally need 6-foot to 8-foot rods for adequate visibility. These longer lengths help the pennant peek over the massive rooflines of lifted Jeeps and trucks. Heavy-duty brackets become essential here. The wind resistance against an 8-foot pole at highway speeds requires structural integrity.
ATVs keep riders exposed and maintain a lower center of gravity. Most riders utilize rear rack mounts for their safety gear. The industry standardizes around 4-foot to 6-foot lengths for quads. This range depends heavily on rider height and primary terrain. When you stand up on the pegs, your body blocks shorter markers. A 5-foot pole usually provides the perfect balance. It clears the rider's helmet while remaining manageable in mildly wooded areas. You avoid the excessive top-heaviness caused by overly long equipment.
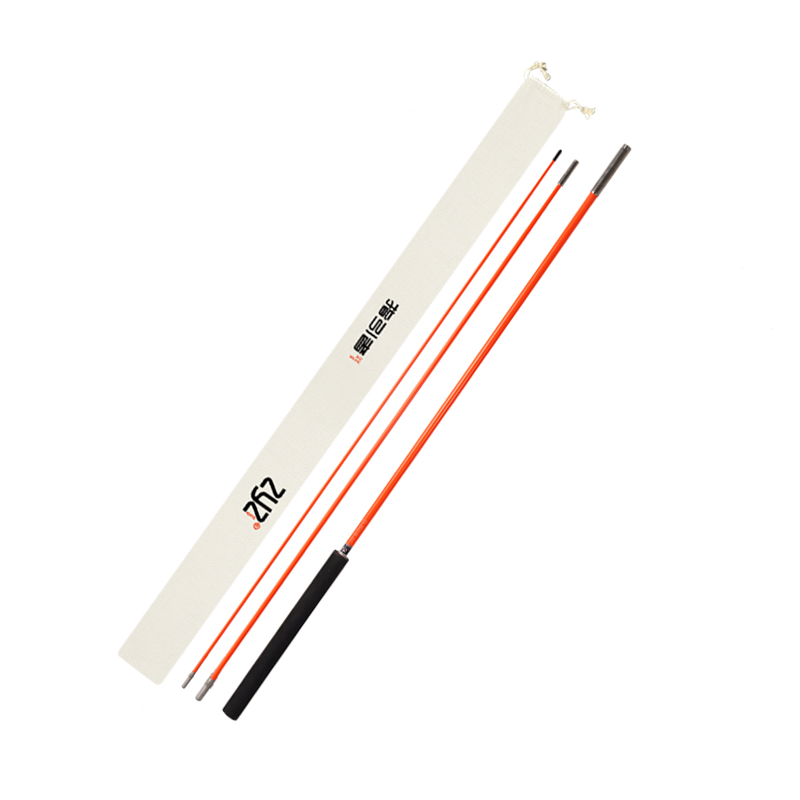
Dune riding prioritizes maximum visibility above all else. You face zero overhead obstacles in the open desert. Therefore, you should maximize your equipment size. An ideal size falls between 6 and 8 feet, assuming you use lower cage or bumper mounts. This setup ensures oncoming traffic spots you miles away. Local rules dictate specific non-negotiable factors here. Many parks require international safety orange or red pennants. They also mandate minimum fabric dimensions, typically 10 by 14 inches. You cannot substitute small decorative banners for certified safety markers in these zones.
Forest environments demand clearance and snag prevention. Tall equipment becomes a severe hazard among low branches. Your ideal size shrinks to a 2-foot or 4-foot maximum. You must sacrifice distant visibility for physical survival. Non-negotiable hardware features change dramatically in the woods. You must select high-flex fiberglass cores. These materials bend flat and snap back into shape seamlessly. Heavy-duty spring bases also become mandatory. They absorb the violent shock of sudden branch strikes. Without a spring base, a solid hit will rip the mounting bracket directly off your roll cage.
Rock crawling happens at a walking pace. You do not worry about high-speed head-on collisions. Instead, spotter visibility becomes the primary requirement. Your spotter needs to track vehicle tilt and chassis angles from a distance. An ideal size ranges from 3 to 4 feet. This length provides a clear visual reference point without interfering with the spotter's view. Furthermore, rollovers happen frequently in extreme rock crawling. A massive 8-foot pole will shatter immediately during a slow-speed roll. A shorter, highly flexible 3-foot marker often survives the impact completely intact.
Illuminated equipment dominates the modern night-riding scene. However, LED setups introduce complex electrical constraints. You must assess the power draw limitations on your UTV stators. Running dual 6-foot illuminated poles draws significant amperage. Older vehicles struggle to maintain battery voltage under this load. Furthermore, consider the physical rigidity of LED tubes. Manufacturers encase LED strips in thick polycarbonate or resin. This makes them highly prone to cracking if struck by debris. Traditional fiberglass rods offer far superior flexibility. A standard fiberglass rod bends almost 90 degrees without breaking. LED tubes will shatter under similar stress.
The base mechanism dictates how easily you manage your equipment. You must evaluate quick-release mechanisms carefully. Push-and-turn styles offer rapid deployment. Pin-lock styles provide more rugged security in heavy vibration environments. You also need to verify tube diameter compatibility. Modern UTV roll cages use varying steel pipe sizes. Ensure your selected brackets fit standard 1.75-inch or 2-inch roll cages precisely. Loose brackets rotate downward during rough rides. A tight, perfectly matched aluminum clamp secures the base firmly in place. Always apply thread locker compound to the bracket bolts during assembly.
A rigid mount forces the pole to absorb 100 percent of impact energy. A heavy-duty barrel spring changes this dynamic entirely. You must understand when a spring base is required. It acts as a mechanical fuse for your setup. It is absolutely mandatory for stiff LED models in uneven terrain. As the vehicle chassis rocks violently side to side, the heavy pole creates immense leverage. The spring base flexes, transferring stress away from the delicate aluminum base threads. Without this spring, the threaded stem frequently snaps flush inside the mounting bracket. This ruins both the pole and the mount simultaneously.
Heat destroys fiberglass and nylon materials quickly. Many riders mount their equipment directly above high-clearance exhausts. This creates a severe rollout risk. The intense radiant heat melts the protective outer tubing within minutes. Hot exhaust gases also weaken the structural integrity of the resin core. You must ensure a minimum clearance of 12 inches between the exhaust tip and the mounting bracket. If you cannot achieve this distance, you must fabricate a heat shield. Proper placement prevents catastrophic equipment failure on your very first ride.
Wiring introduces numerous potential failure points. Sloppy installation guarantees electrical shorts deep in the trails. You must mitigate pinch points in roll cage articulation zones and tailgate hinges. Wires routed through moving suspension components strip their insulation instantly.
Follow these standardized steps for safe wire routing:
Garage doors and enclosed trailers ruin perfectly good equipment daily. Riders frequently forget their new vertical clearance limits. Backing a UTV into a standard toy hauler with a 6-foot pole attached snaps the rod instantly. You must factor in transport limitations before finalizing your setup. This highlights exactly why investing in quick-disconnect hardware pays off immediately. You simply pull a pin, remove the pole, and load the vehicle safely. Avoid threaded mounts that require wrenches for removal. You will eventually leave the wrench at home and damage the equipment out of frustration.
Selecting the proper visibility gear requires a calculated approach. Choose your primary terrain first. If you ride open sand dunes, default to 5-foot or 6-foot lengths. You must adjust your mount height to hit that critical 9-foot total elevation. If you primarily ride wooded trails, cap your equipment at 3 to 4 feet and install a heavy-duty spring base.
Take action before your next trip. Grab a tape measure and check your intended mounting point from the ground. Verify your local OHV park's minimum height rules online. Finally, select a high-quality roll-bar or bumper mount that matches your vehicle's cage diameter perfectly. Doing this prep work ensures continuous safety, absolute legal compliance, and a hassle-free weekend on the trails.
A: You should never cut fiberglass rods. Cutting ruins the structural integrity of the core. It exposes raw fiberglass splinters that fray rapidly under wind resistance. The shortened end also fails to fit standard mounting caps properly. We highly recommend buying the correct size instead of modifying existing equipment.
A: One properly sized unit satisfies legal compliance and basic safety requirements at nearly all OHV parks. However, many riders run dual setups for aesthetic symmetry and superior night visibility. Dual illuminated poles create a wider visual footprint, making it easier for trailing drivers to gauge your vehicle's width.
A: Rear upper cage pillars offer the best balance of height and protection. They keep the base elevated above trail debris. Rear bumper or bed mounts force you to use much longer poles to clear the roofline. These lower points also expose the base brackets to mud and direct rock impacts.
A: Yes, it can drain smaller batteries if the engine is off. High-density LED models draw significant amperage. ATVs have smaller stators compared to full-size UTVs. You must wire the lights to keyed power. This ensures they shut off automatically when you remove the key, preventing a dead battery.


